It's very easy to create your own hatch patterns. Hatch patterns are defined in .PAT-files, usually named ACAD.PAT and ACADISO.PAT.
A definition looks like this:
*PATTERN_NAME[, DESCRIPTION]
line1
line2
.
.
In common, blanks written in hatch pattern definition are not necessary for drawing the hatch patterns correctly! This is important when creating complex hatch patterns or line type definitions, because one line in the hatch pattern definition file (excluding carriage return and line feed) may not be longer than 80 characters! In the sample code they are only used for making the code easy to read.
A hatch pattern definition may use more than one line for line type definitions. Each line consists of:
angle, x-origin, y-origin, delta-x, delta-y, line, blank[, line, blank, ...]
Let's see how to do it looking on an example hatch pattern that will show big and small squares. Firstly, give your hatch pattern a name an a description. Secondly, we'll add the first line of the line type descriptions. The base point of the definition is the left bottom corner. For using angles, 0° is horizontal from left to right.
Positive angles are counter clockwise!
*SQUARES, big and small squares
0,  0,0,  0,1,  1,-1
So the first line is dashed horizontal (left to right) and start at the base point [0,0]. The line has no delta in x-direction and is repeating every 1 drawing unit (DU). So delta-y is 1. The line type definiton works like when defining your own AutoCAD® line types:
Positive values are lines,
negative values are spaces,
lines using length 0 are used for drawing dots!
So the line type definition 1,-1 means 1 DU line, 1 DU blank, repeating continuously.
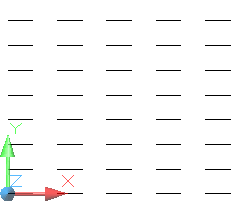
As you can see near by, the dashed line starts in
[0,0].Also the line is repeating in y-direction.
The next line type definition draws the vertical dashed line:
90, 0,0, 0,1, 1,-1
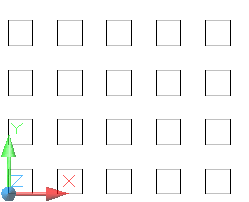
It's the same line type as used in Step 1,
but rotated 90 degrees counter clockwise.
Let's have a look at the second definition line:
90 ... the line is vertical upwards0,0 ... the line starts in the same point as the first dashed line(the first step is greyed out!)
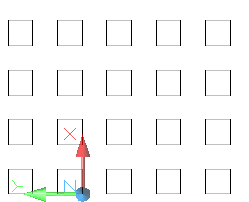
For the rest of the line definition you have to
rotate the coodinate system:
0,1 ... means that the line is repeating in x-direction,not in y-direction
1,-1 ... 1 DU line, 1 DU space (indicated by the minus)Now the big ones work. Let's start with the small squares:
0, 1.25,1.25, 0,2, .5,-1.5
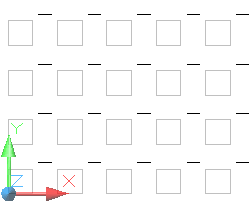
Let's see:
0 ... the line is horizontal from left to right1.25,1.25 ... the line starts 1.25 DUs left from the originand 1.25 DUs above the origin
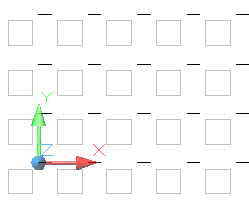
0,2 ... the line is repeating in y-direction, every 2 drawing units.5,-1.5 ... so the line type is half an DU line, and 1.5 DUs blank!We're still missing the second horizontal line:
0, 1.25,1.75, 0,2, .5,-1.5
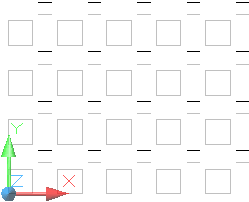
The only difference between Part 3 and Part 4 ist the y-origin,
that is 1.75 DUs and not 1.25 DUs!
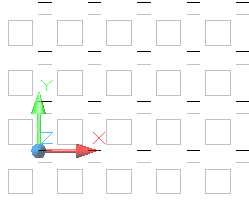
... already said ...
The first vertical line of the small squares is done this way:
90, 1.25,1.25, 0,2, .5,-1.5
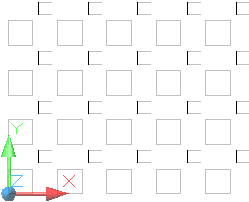
... It's very easy to do ...
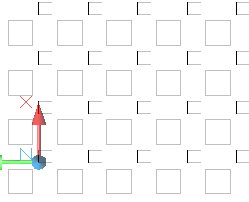
... described above ...
Finally draw the missing vertical line:
90, 1.75,1.25, 0,2, .5,-1.5
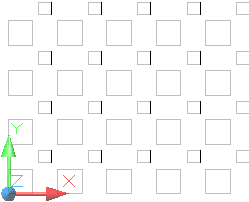
... no more to say ...
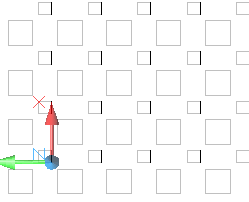
... finished! ...
As conclusion you can see the whole finished hatch pattern definition here! only insert it to your acad.pat-file, restart AutoCAD®, if running, and have a try!
*SQUARES, big and small squares

0,  0,0,  0,1,  1,-1

90,  0,0,  0,1,  1,-1

0,  1.25,1.25,  0,2,  .5,-1.5

0,  1.25,1.75,  0,2,  .5,-1.5

90,  1.25,1.25,  0,2,  .5,-1.5

90,  1.75,1.25,  0,2,  .5,-1.5


